
How to Paint Military LEGO Models: A Comprehensive Guide

Introduction
LEGO(and other brick sets) enthusiasts who have a passion for military-themed models often find themselves wanting to add custom paintwork to their creations. Painting military LEGO models allows you to showcase unique designs, add intricate details, and personalize your creations. In this comprehensive guide, SoMiniBricks will walk you through the process of painting military LEGO models, from the necessary tools and techniques to color selection and finishing touches like adding some cool decals or custom minifigures. Whether you're a seasoned LEGO builder or a beginner, this guide will help you bring your military LEGO models to life with stunning paintwork.
Table of Contents
|
Heading |
|---|
|
1. Understanding Military LEGO Models |
|
2. Tools and Materials |
|
3. Preparing the Model |
|
4. Choosing the Right Colors |
|
5. Basic Painting Techniques |
|
6. Adding Details |
|
7. Weathering and Aging |
|
8. Applying Finishing Touches |
|
9. Protecting Your Paintwork |
|
10. Frequently Asked Questions |
|
11. Conclusion |
1. Understanding Military LEGO Models
Military LEGO models encompass a wide range of themes, including tanks, aircraft, ships, and soldiers. These models often require precise paintwork to replicate real-world military vehicles and uniforms. Understanding the specific details and color schemes of your chosen military subject is crucial for achieving realistic results.

2. Tools and Materials
To paint military LEGO models, you'll need the following tools and materials:
-
Fine paintbrushes of various sizes
-
Acrylic paints in military-themed colors
-
Spray paints in camouflage colors
-
Palette or paint mixing surface
-
Paint thinner or water for thinning paints
-
Masking tape for creating clean edges
-
Clear sealant for protecting the paintwork
-
Paper towels or a cloth for cleaning brushes
3. Preparing the Model
Before you start painting, it's essential to prepare your LEGO model:
-
Disassemble the Model: (Optional)Take apart the LEGO model into its individual components. This step allows for easier access to each part and ensures a smoother painting process.
-
Clean the Bricks: Remove any dust, dirt, or residue from the LEGO bricks. Gently wash them with mild soapy water, rinse thoroughly, and allow them to dry completely. If you leave your model built, you can clean it with some small alcohol wipes to get of any finger grease.
-
Sand the Surface: Use fine-grit sandpaper to lightly sand the surface of the bricks. This step helps the paint adhere better and creates a slightly rough texture for improved adhesion. I only sand if it is a large flat surface and easy to get to.
4. Choosing the Right Colors
Selecting the right colors is crucial for achieving realistic military paintwork. Consider the following tips:
-
Research Military Color Schemes: Study reference images and resources to understand the color schemes used in real-world military vehicles or uniforms. This knowledge will guide your color selection.
-
Use High-Quality Acrylic Paints: Invest in high-quality acrylic paints formulated for miniature models. These paints offer vibrant colors and excellent coverage.
-
Here at SoMiniBricks.com we like to use the Rust-oeum camouflage paints.

5. Basic Painting Techniques
Mastering basic painting techniques is essential for achieving clean and precise paintwork on your military LEGO models. Here are some techniques to consider:
-
Base Coating: Apply a base coat of the primary color to the desired areas of your model. Use thin layers and allow each layer to dry before applying additional coats.
-
Layering: Layering involves gradually building up colors by applying thin coats one over another. This technique adds depth and dimension to your model.
-
Dry Brushing: Dry brushing is a technique that involves using a small amount of paint on a brush with most of the paint wiped off. Lightly brush the raised areas of the model to highlight details and create a weathered effect.

6. Adding Details
Adding details is a crucial step in painting military LEGO models. Consider the following techniques:
-
Fine Brushwork: Use small, fine brushes to add intricate details such as camouflage patterns, unit markings, or insignias. Take your time and work with precision.
-
Washes: Apply thinned-down dark paint washes to the recessed areas of your model to create depth and enhance the details.
- Custom decal set from Sominibricks.com
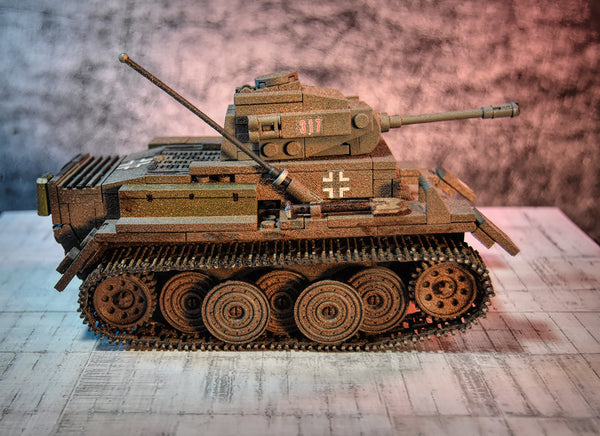
7. Weathering and Aging
Weathering and aging techniques can make your military LEGO models appear more realistic and battle-worn. Try these techniques:
-
Dry Pigments: Apply dry pigments with a brush or sponge to simulate dust, dirt, or rust. Use a variety of earth tones to achieve a weathered effect.
-
Chipping and Scratches: Use a fine brush or a toothpick to carefully paint small chips and scratches on the edges of your model. This technique adds authenticity and character.
8. Applying Finishing Touches
To complete your painted military LEGO model, consider these finishing touches:
-
Gloss and Matte Varnish: Apply a gloss varnish to areas that require a shiny or reflective finish, such as windows or metallic parts. Use matte varnish for the rest of the model to reduce shine and create a more realistic appearance.
-
Final Details: Add any remaining details, such as antennas, gun barrels, or decals, to enhance the overall look of your model.
-
Use some of our custom minifigures to make your diorama.
9. Protecting Your Paintwork
To ensure the longevity of your painted military LEGO models, consider the following steps:
-
Apply a Clear Sealant: Once your paintwork is dry, protect it by applying a clear sealant. This step helps prevent chipping and protects against UV damage.
-
Handle with Care: When handling your painted models, avoid touching the painted areas directly to prevent smudging or scratching.
-
Put your painted model in a solid wood ModlBox for display.
Frequently Asked Questions
Q: Can I paint LEGO models without disassembling them? A: It's recommended to disassemble the LEGO model before painting to ensure even coverage and easier access to all parts.
Q: Can I mix different brands of acrylic paints? A: Yes, you can mix different brands of acrylic paints to achieve the desired color. However, be mindful of the consistency and compatibility of the paints.
Q: Should I prime my LEGO model before painting? A: Priming is not necessary for painting LEGO models. However, it can provide better adhesion and durability for certain types of paints.
Q: Can I use spray paint on LEGO models? A: Spray paints are generally not recommended for LEGO models, as they can affect the plastic's integrity and create uneven coverage.
Q: How do I fix mistakes or repaint a section? A: If you make a mistake or want to repaint a specific area, gently sand the surface and remove the paint using a suitable paint thinner. Then, follow the painting process again.
Q: How can I learn advanced painting techniques for LEGO models? A: Consider joining LEGO enthusiast communities, online forums, or watching tutorial videos to learn and explore advanced painting techniques specific to LEGO models.
Conclusion
Painting military LEGO models allows you to express your creativity and attention to detail. By following the steps and techniques outlined in this guide, you can achieve stunning results that bring your LEGO military creations to life. Remember to research color and take your time.
I will show you how to paint your tank tracks on your Lego in the next post.


